Many homeowners in Leesburg, VA notice cold air seeping through their exterior doors, driving up energy bills and creating dangerous moisture risks. You can fix drafts and leaks with simple, effective repairs. This guide shows you how to identify problem areas, choose the right materials, and apply long-lasting solutions that improve comfort and efficiency.
Key Takeaways:
- Weatherstripping is one of the most effective and affordable ways to stop drafts around exterior doors; inspecting and replacing worn strips can make a noticeable difference in comfort and energy efficiency.
- Door sweeps and thresholds should be checked regularly-gaps at the bottom of the door are common sources of air leaks, and a properly installed sweep can seal this space effectively.
- Warped or misaligned doors often leave visible gaps around the frame; adjusting hinges or repositioning the door can restore a tight seal and prevent cold air from entering.
Identifying the Source of Drafts and Leaks
Start by running your hand along the door frame on a windy day-you’ll feel cold air where seals have failed. Check for visible gaps, discolored paint, or peeling caulk, all signs of air infiltration. Ignoring these cues lets moisture in, risking rot and higher energy bills. A simple smoke test with incense can reveal hidden drafts around hinges and thresholds.
Common Entry Points for Air and Moisture
Gaps around the door frame, worn weatherstripping, and cracked thresholds are frequent culprits. Moisture often sneaks in through the bottom of the door where wood meets the sill. Even small openings compromise comfort and efficiency, allowing pests and humidity to enter your home over time.
The Impact of Leesburg’s Seasonal Humidity Changes
Swelling wood in summer humidity can warp doors, creating uneven gaps when it dries in fall. These shifting conditions strain seals and hinges. Repeated expansion and contraction lead to cracks, making it harder to maintain a tight barrier against drafts and water intrusion.
Leesburg’s humid summers and dry winters put constant stress on exterior doors. When wood absorbs moisture, it expands-sometimes enough to bind against the frame. As seasons change and humidity drops, the wood shrinks, leaving gaps. This cycle weakens joints and breaks seals, inviting drafts, water leaks, and potential structural damage if left unaddressed.
Factors Influencing Door Seal Degradation
Multiple factors accelerate the breakdown of your exterior door’s seal.
- Exposure to extreme weather weakens materials over time
- Material wear from constant use reduces effectiveness
- Structural settling shifts the frame out of alignment
- Poor initial installation quality invites early failure
Recognizing these signs early helps prevent energy loss and costly repairs.
Material Wear and Exposure to the Elements
Constant contact with sunlight, rain, and temperature swings deteriorates door components. Wood swells and cracks, metal hinges corrode, and weatherstripping becomes brittle. These changes create gaps that let air and moisture inside. You’ll notice drafts near the base or sides after harsh seasons. Protecting your door with finishes and timely maintenance slows this decline.
Structural Settling and Hinge Misalignment
Over time, your home’s foundation shifts slightly, altering how the door sits in its frame. This movement causes hinge misalignment, making the door rub or leave gaps. You may struggle to latch it or feel cold air seeping through one side. These signs point to deeper structural behavior affecting performance.
Structural settling is a natural process in all homes, especially in Leesburg’s clay-rich soil that expands and contracts with moisture. When the frame tilts even slightly, the door no longer seals evenly, creating drafts, water infiltration, and increased energy bills. Hinges may sag due to screw pullout from loosened wood, worsening the gap. A simple test-checking for uneven gaps around the door-can reveal misalignment. Correcting it often requires shimming hinges or adjusting the strike plate, but severe cases may need professional realignment to restore a tight seal and prevent long-term damage.
How-to Replace Worn Weatherstripping
Start by inspecting your door’s perimeter for cracked, brittle, or missing weatherstripping. Drafts and moisture intrusion often stem from degraded seals, so replacing them boosts comfort and efficiency. Remove old material cleanly, then measure and cut new strips to fit. Properly installed weatherstripping can reduce energy bills and block outdoor noise effectively.
Selecting the Right Sealant Material for Your Door
Choose a sealant based on your door’s type and exposure to weather. Adhesive-backed foam works well for interior-facing doors, while vinyl or rubber V-strips handle heavy use and outdoor elements better. For uneven gaps, compression seals offer a tighter fit. Matching the material to your door’s needs ensures long-lasting protection against drafts and water.
Step-by-Step Removal and Installation Process
Peel off the old weatherstripping completely, cleaning the surface with rubbing alcohol before installing new strips. Align the replacement precisely along the door jamb or edge. Press firmly to secure adhesive backing. A proper seal forms only when gaps are fully covered and corners are sealed.
| Step | Action |
| 1 | Remove old weatherstripping using a putty knife or scraper |
| 2 | Clean the surface with isopropyl alcohol to remove residue |
| 3 | Measure and cut new weatherstripping to match door dimensions |
| 4 | Peel backing and press strip firmly into place along the jamb |
| 5 | Test door closure to ensure even compression and no gaps |
Follow each stage carefully to avoid misalignment or poor adhesion. Skipping surface cleaning can cause premature peeling, undermining your repair. Cut corners precisely-overlapping or stretching the material creates weak spots. When done right, the new weatherstripping will form an airtight barrier that lasts for years with minimal maintenance.
| Common Mistake | Solution |
| Leaving old adhesive residue | Use a plastic scraper and solvent wipe for a clean base |
| Incorrect length cuts | Measure twice, cut once-allow slight overlap at corners |
| Uneven pressure during installation | Press down firmly along the entire length with your fingers |
| Using wrong type for exterior doors | Opt for UV-resistant rubber or silicone-based seals |
| Ignoring threshold seal | Install door sweeps or kerf seals to close the bottom gap |
Essential Tips for Sealing Thresholds and Sweeps
Keep your home airtight by checking the threshold seal and door sweep regularly. Replace worn sweeps and adjust thresholds to eliminate gaps. Use weatherstripping for added protection against drafts and water infiltration. Perceiving
- Inspect the door sweep for wear every season
- Adjust the threshold height to match the sweep’s contact point
- Choose exterior-grade materials for lasting performance
- Ensure no daylight shows beneath the closed door
Adjusting the Door Bottom for a Watertight Fit
Align the door bottom so it meets the threshold without dragging. A gap lets in moisture and cold air, but too much pressure wears the sweep. Make incremental adjustments and test the seal. Perceiving
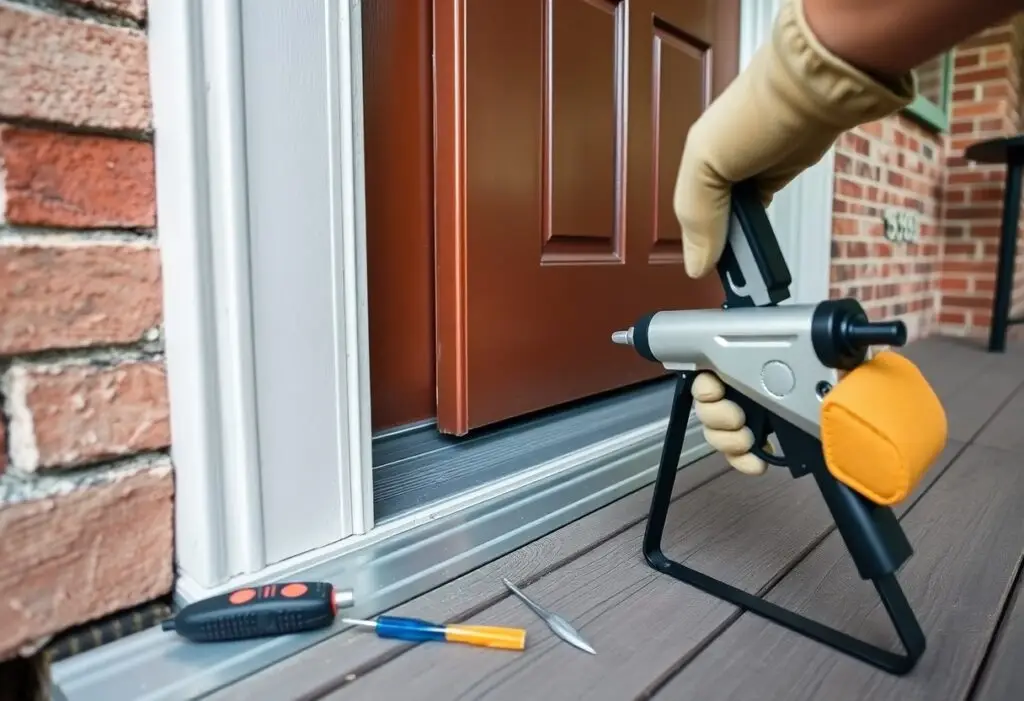
Applying Exterior-Grade Caulk to the Door Frame
Seal gaps between the door frame and siding with exterior-grade caulk to block air leaks and water intrusion. Smooth the bead for a clean finish and let it cure fully. Perceiving
Use a high-quality silicone or polyurethane caulk where the door frame meets the house exterior. These areas often develop cracks from seasonal movement. Apply caulk on dry days above 40°F to ensure proper adhesion. Focus on the top and side jambs, where water can seep behind trim and cause rot. A well-sealed frame prevents costly structural damage over time.
Correcting Alignment and Hardware Issues
Proper door function starts with alignment and hardware in good working order. Even slight shifts in your door’s position can create gaps that let in air, moisture, and pests. Ignoring these issues worsens energy loss and security risks over time. A few simple adjustments often restore a tight seal and smooth operation.
Tightening Hinges to Eliminate Gaps
Loose hinges are a common cause of door misalignment. You’ll often notice sagging or rubbing against the frame. Using a screwdriver or drill, snug each hinge screw securely-this small step can close visible gaps and stop drafts instantly. If screws spin without tightening, replace them with longer ones for better grip.
Ensuring Proper Latch and Deadbolt Engagement
Your door should close smoothly with the latch clicking firmly into place. If the bolt doesn’t align with the strike plate, air leaks and security flaws follow. A misaligned deadbolt can leave your home vulnerable and make weatherstripping ineffective. Small adjustments make a big difference in performance and safety.
When the latch or deadbolt doesn’t engage correctly, it’s usually due to shifted strike plates or frame movement. Check whether the bolt slides into the plate without force. If not, loosen the strike plate, reposition it slightly, and reattach it. This fix improves both security and energy efficiency by ensuring the door seals fully when closed. Test the lock repeatedly from outside to confirm smooth operation.
Professional Maintenance vs. DIY Repair
You can handle minor door adjustments and weatherstripping replacements on your own, especially if you’re experienced with home repairs. However, improper sealing or misaligned frames often require specialized tools and knowledge. Attempting complex fixes without expertise may worsen energy loss or damage, making professional service a smarter long-term choice.
When to Seek Expert Assistance in Northern Virginia
Water pooling at the threshold, persistent cold spots, or doors that stick in certain seasons signal deeper issues. These problems often stem from foundation shifts or rot-common in Leesburg’s humid climate. Ignoring them risks structural damage and high energy bills, so professional assessment is crucial.
Long-term Benefits of Professional Weatherproofing
Expert sealing and insulation reduce air leakage by up to 30%, cutting heating and cooling costs year-round. Trained technicians use commercial-grade materials that outlast retail products. You gain lasting comfort, lower utility bills, and protection against moisture damage-a smart investment for any Northern Virginia homeowner.
Professional weatherproofing goes beyond temporary fixes. Technicians inspect the entire door assembly, including jambs, thresholds, and sidelites, ensuring every gap is sealed with durable, weather-resistant materials. This comprehensive approach prevents not only drafts but also pest intrusion and wood rot. With proper installation, your door system can maintain peak efficiency for decades, protecting your home’s interior and structural integrity through Virginia’s fluctuating seasons.
Conclusion
Now you know how to stop drafts and leaks with effective exterior door repair in Leesburg, VA. Simple fixes like adjusting hinges, replacing weatherstripping, or sealing gaps can make a real difference. You have the power to improve comfort, cut energy costs, and protect your home with timely, hands-on maintenance.